Let’s delve deeper into why setting up Google Search Console is essential for website owners. By doing so, you’ll gain valuable insights into your site’s performance, identify areas for improvement, and enhance your overall visibility on Google.
- Sign Up and Sign In:
- If you don’t have a Google account, create one.
- Visit Google Search Console and click the blue “Start now” button.
- Sign in with your Google account.
- Add Your Website:
- Click “Add a property.”
- Choose “Website” from the drop-down menu.
- Enter your website URL.
- Verify Ownership:
- Google needs to verify that you own the website.
- Follow the verification steps provided by Google. Common methods include adding an HTML tag to your site or using Google Analytics.
- Explore the Dashboard:
- Once verified, explore your property’s dashboard.
- Check for important issues, like security alerts or manual actions.
- Review high-level performance charts, index coverage, and more.
- Performance Reports:
- Use the appropriate Performance report for your site (web search, news search, or discover).
- Understand how your site is performing on Google.
- Security Issues:
- Open the Security Issues report to check for evidence of hacking.
- Address any security issues promptly.
- Manual Actions:
- Open the Manual Actions report to see if your site violates any Google spam policies.
- Correct any violations to avoid content omission from search results.
In-depth Guide to Verifying Ownership of your Website
Verifying ownership of your WordPress site in Google Search Console is essential for monitoring its performance. Here are three methods you can use:
- HTML Tag Verification:
- Sign in to Google Search Console using your Google account.
- Click “Add property” and enter your site URL.
- Choose the “HTML tag” method.
- Copy the provided meta tag.
- Install a plugin like “Insert Headers and Footers” on your WordPress site.
- Paste the meta tag in the header section.
- Go back to Search Console and click “Verify.”
- HTML File Upload:
- Download the HTML verification file from Search Console.
- Upload it to your WordPress site’s root directory via FTP.
- Return to Search Console and click “Verify.”
- Google Analytics Verification:
- If you use Google Analytics, verify ownership through GA.
- Sign in to Search Console.
- Choose the “Google Analytics” method.
- Select your GA account and property.
- Click “Verify.”
Become a Google Search Console Performance Expert

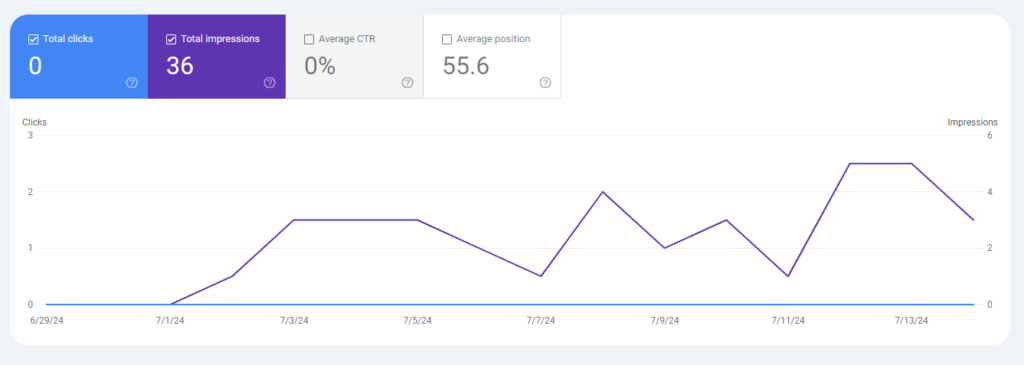
When you first enter the Performance tab in Google Search Console you will be met with a graph that looks something like this. This will be your main basis to measure your websites performance. The default values that are present are ‘Total clicks’ and ‘Total impressions’. Total clicks are referring to the number of times that pages on your website have been click on via a Google Search exclusively. Whereas Total impressions, refer to the number of times that a page on your website has appeared on a google search. There are two optional data points that can be viewed on the graph by checking the checkbox next to the names, ‘Average CTR’ and ‘Average Position’.

Average CTR stands for average click-through-rate. This essentially boils down to a percentage value of how many clicks a page received per the number of impressions. Example: If your site received 1 Total Click and 100 Total impressions, the CTR would be 1%. Average position is the average position one of your site’s appears on a Google Search.
Conclusion
Mastering Google Search Console is crucial for website owners. By following the steps outlined in this guide, you’ll gain valuable insights into your site’s performance, identify and address issues, and enhance your overall visibility on Google. Remember to regularly monitor your property, explore performance reports, and stay informed about SEO best practices.


